Wednesday, May 28, 2008

Color Palette: Trout Stream

Two things happened a couple days ago. First, I read a blog entry by Heather Powers at Art Bead Scene asking us to name one thing in nature that is our biggest source of inspiration in our jewelry designs. I answered: Autumn colors.

That is the short answer. The long answer encompasses more...when it is spring or summer and there are no autumn colors, I am in search of colors in nature that are something other than green. The trees are green, the grass is green.....cool green dominates the landscape. So when I see reds, oranges, warm yellow-greens or purples, I am very inspired to do a painting or create that color in polymer.

Castle Creek

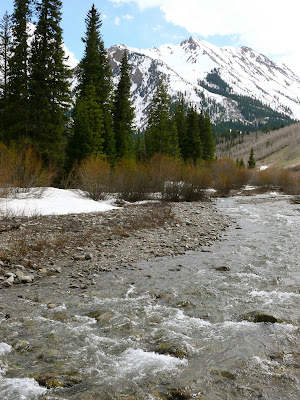
Later that afternoon, I found myself alongside Castle Creek near Aspen. I admired the rocks in the creek, and marveled how warm those rock colors were despite being under cold rushing water. The only blue in the water was a bit of sky reflection.

Closeup photo of the colors in Castle Creek

The colors in rocky mountain creeks are always a great inspiration to me. And despite the fact that spring has barely sprung in the high elevation of upper Castle Creek, the water colors are reminiscent of the autumn colors I like. The next day created a color palette I call "Trout Stream", based on the colors I found in the above abstract-like photo.


Trout Stream Color Sample Tiles

I have an idea what I am going to do with this collection of colors, now that I spent a good part of the day mixing them. I am going to work on some jewelry sized polymer mosaic pieces, and I'll post the results here.

In the meantime, check out Tish Collins' color palette of polymer mosaics. It's wonderful.

Friday, May 09, 2008

Life Long Mold Making

This morning, without warning, I decided to blog about my mold making history. So here is a very brief retrospective:

I've loved making things out of molds since I was a kid...I used to have a Creepy Crawler set in the 1960s, I was fascinated by being able to pour "goop" into a mold, heat it and come out with a rubbery bug. After that childhood introduction, I never used any more molds until I was an adult, but you could say the die was cast.

A few of the hundreds of horse rubber stamp designs I made in the 1990s

In 1989, I started my own rubber stamp business called True West Designs. I had molds made from my own original artwork (I never used clipart), then pressed sheets of uncured rubber into a vulcanizer to create each rubber stamp. I did very well with my stamp business, having started it just a couple years before the stamping craze hit. I did all the production myself, and during the peak mid-1990s I used to get wholesale orders for hundreds of stamps at a time. I was extremely busy and made some good money for a lot of years.

In the mid 1990s, I started sculpting horses and making my own plaster molds for slip casting. In 1996, I spent a day with Joan Berkwitz of Pour Horse Pottery in Carlsbad, California, and Joan kindly shared a lot of mold making tips with me.

"Hipshot" a pony I sculpted in 1999 and cast using a four piece plaster mold

Manatee ornaments I made in 2001

I started beading in 2000, and that evolved into making my own ceramic beads. I sculpted originals and made two piece plaster molds for slip casting. It was a much simpler process than the more complicated model horse molds, but still labor intensive.


Manatee ornaments and beads in progress, in the greenware state after slip casting in 2003. Shown are fish, frogs, horses, turtles, etc.

Back in my ceramic days, it was hard to imagine ever giving up earthen clay for polymer clay. But that is what happened, as I have found the imitative techniques and ease of polymer mold making and casting to be very appealing. I can work out my ideas with less time from conception to realization. I used to have to cast many ceramic pieces to fill the kiln before firing, and the lag time was really frustrating, not to mention the less than great results I'd often get.

So here I am at my current state of evolution. I made these beads this week out of polymer using the imitative ivory technique:

Imitative ivory press molded beads-2008

Tuesday, April 22, 2008

Dayle Doroshow Workshop: Messengers & Storytellers

Messengers & Storytellers

Day two of Dayle Doroshow's polymer workshop was Messengers & Storytellers. We spent the day making figures, learning the techniques for making them and embellishing them with canes and mokume gane that we brought from home. This is normally a two day class, so we had to cram a lot of ideas into one day.

One of my ideas, sparked by a freeform method of collage that Dayle had us do, was a polymer figure I called "What To Wear?" My figure is a funny looking woman who isn't as good looking as she thinks she is, and her attire (various canes applied to her body) was all over the place color and design-wise. Maybe some in the class thought I had no feel for combining colors....but it was intentional on my part as I wanted this figure to be odd looking.

The above photo shows her in the middle with her soul mates, the fish (left) and bird (right). The door in the center of her opens and reveals the message "What To Wear?" The fish will have a message, too, but I'm not sure what it is going to say yet.


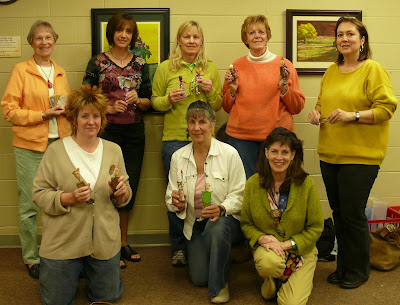
Here is the group of us at the end of the day before we departed full of ideas! I'm in the back in the middle. I'm so happy to have new polymer friends! These are the first polymer people I have met and it is so much fun to talk polymer with artists who understand and more importantly I learned something from every one of them.

Thanks, Dayle, for your warm and friendly approach to sharing your polymer ideas!

Monday, April 21, 2008

Dayle Doroshow Workshop: Chaos Cards

Dayle rolls out some clay to demonstrate a technique


Over the weekend, I traveled from my home in Aspen to Colorado Springs for a two day workshop with Dayle Doroshow, sponsored by Pikes Peak Polymer Clay Guild. After having not traveled much this winter, it was a nice road trip and the weather was great.

The first day was a workshop called Chaos Cards. Dayle had us make polymer cards that serve as inspirational jumpstarts for polymer or mixed media projects. We had the opportunity to try new techniques or revisit old ones while making these cards.


Chaos Cards I made on Saturday

I had a lot of fun with everyone in the class. Whenever I take a workshop, I always learn from seeing what the other students are doing and this weekend was no exception. 

Above is some of the cards I made. Time was short so we weren't able to do our best work, but Chaos Cards is a great idea and I will be creating more once I get home. Tomorrow I'll review the second day of Dayle's workshop.

Thursday, April 10, 2008

Fun With Tory: More Imitative Ivory

imitative ivory beads-fish 1 1/2", horse and rabbit 1"

I carved and sculpted a fish, horse, and rabbit bead, then made a two sided push mold for each design. The figures appear on both sides of the beads. I used the imitative ivory technique that I learned from Tory Hughe's book. I have been making these types of beads in ceramic for many years, but for the polymer version, I was inspired by Dayle Doroshow's Imitative Ivory Face Beads shown in Tory's book.

Speaking of Dayle Doroshow, I am taking a two day workshop with her in Colorado Springs on April 19th and 20th! I couldn't be more excited and will report back here on how the workshop went. Colorado Springs is about 225 miles from where I live, and it will be a nice weekend road trip and I look forward to meeting the clay artists of Pikes Peak Polymer Clay Guild.

Saturday, April 05, 2008

Fun With Barbara McGuire: Color Wheel

color wheel before baking

.....and a tip of the hat to Maggie Maggio who created and shared this color mixing technique.

I'd seen Maggie's videos about mixing colors on her blog, but it wasn't until I got the "Images On Clay II" by Barbara McGuire that spurred me into action to create a color wheel of beads. Maggie demonstrates using clay colors that are close to being true primaries: Premo Zinc Yellow, Cobalt Blue, and Fuchsia.

Barbara used Metallic Copper, Metallic Gold, and Pearl Blue, and the results are more earthy tones. I love that! I did a similar thing, but added some red to the copper and added some yellow to the gold to make them slightly closer (and brighter) to standard primaries while retaining the earthiness.

"Images On Clay II" is about image transfer on polymer clay, but this color mixing segment is included in the book and I highly recommend that any polymer artist who hasn't done this exercise to make a bead color wheel immediately! The link to the book is in my amazon.com list on the right. I love the secondary colors created by mixing the primaries, and plan to do more experimenting very soon.

color wheel in progress

Thursday, March 20, 2008

Polymer Techniques, Bought And Sold.

Recently Kim Cavender blogged about the subject of ethical use of polymer techniques learned from someone who is selling those techniques in the form of a workshop, book, or DVD. As Kim states, this is not a new subject but it recently popped up on her blog as a hot topic after she posted some photos of a polymer workshop or lecture (I think).

I decided when I started blogging about my polymer journey that I would share my progress via posting photos of my recent work, along with crediting and discussing the book or workshop or DVD I learned it from. I fully intend to use the techniques I paid for, just as the teacher is going to spend the money she gets from me in return for the book/workshop/DVD.

However!

Long before Kim's post, I decided not to reveal step by step techniques. Teachers deserve to be paid, and I feel that those who find my results interesting should go out and buy the book themselves. Or take the workshop. Since I am not a polymer expert, pioneer, or teacher, I am blogging about my progress and sharing what I've done. I am not only blogging, but I am logging my progress for my own future benefit as well as others who may stumble across this blog in the process of their own polymer journey.

When I am not exploring polymer I am painting in oil or watercolor. My oil painting guru is Susan Sarback, she comes from a teaching lineage going back to a contemporary of Monet. I work pretty hard to paint the best paintings I can based on her teachings. Susan teaches her students everything she knows about this method of painting, and we all go home stoked and inspired and wanting to be as good a painter as Susan. (We aren't.) Yet I can't imagine Susan showing us how she paints but then telling us not to paint like her!

So just as I pay Susan Sarback for painting workshops, I pay for lessons in polymer techniques.

What's interesting about polymer is it is so technique-based. I stand on the shoulders of some real polymer pioneers when I take that lump of clay, alter the color and shape, and come up with something worthwhile.

Yet unlike following Monet's footsteps (he made it look effortless but believe me, it is not), basic polymer techniques are generally easier to grasp with a bit of practice, and I think that's where often the feculence hits the fan. It's relatively easy to copy other people's polymer work.

What I plan to do with my own polymer work is hone in on the techniques I like, and apply my own imagery, shapes, and color combinations to the things I create using those techniques as a foundation. I wouldn't have ever experimented enough to come up with a way to make imitative ivory, but I'm glad Tory Hughes did and I plan on making some fine original work in imitative ivory. My favorite subjects, shapes and colors show up in my paintings, and they will show up in my polymer, too.

So my summary is: Learn the techniques, but use them as a springboard to your own path to artistic uniqueness. Pay homage to what you love (Flowers? Bright colors? Geometric shapes?) and your art will speak to others and become recognizably your own.
Saturday, March 15, 2008

Fun With Tory: Imitative Ivory


I just finished making my first batch of imitative ivory using the techniques in Victoria Hughes' book, Polymer The Chameleon Clay. Her ivory technique is not just getting the color right, but imitating the striations and aged look of ivory. This was the first technique in her book I tried, it is very exciting to me as I see the potential of making old looking beads.

I made some disk beads from the ivory stock, and also made two pendants, a carved turtle and a carved bird using prebaked inclusions.

Monday, March 10, 2008

Fun With Tory: Prebaked Inclusions


I recently acquired Victoria Hughes' book, Polymer The Chameleon Clay. I am having a lot of fun with it and will be doing many more posts with the results of the imitative techniques she pioneered. For starters, I made a batch of prebaked inlays for future use.

Friday, February 15, 2008

A Look Back: Street Sense Beads


This time last year, I was making 25 ceramic beads in anticipation of the Kentucky Derby. To make a long story short, I used to be in the Thoroughbred racing business and remain friends with Carl Nafzger, who trained Kentucky Derby winners Unbridled (1990) and Street Sense (2007). My husband and I were attending last year's Derby and I worked all winter to create these beads for the close associates of Street Sense. I was confident he was going to win the Derby and wanted everyone to have a memento. (I blogged extensively with lots of photos on livejournal.com about the Street Sense journey, starting with his win in the 2006 Breeders Cup Juvenile and on through Derby week, the Derby, and the Preakness.)

I worked really hard on these beads. I sculpted the original out of plasteline clay, then made a plaster mold for slip casting. After casting them in clay slip one at a time, I cleaned up the mold seam lines, painted them with underglaze in the dark brown color of Street Sense and the blue and yellow jockey's colors of Street Sense's owner. The top photo shows a few of the beads in progress, they have been underglazed and were waiting to be fired, then fired again with the clear glaze.

Though I have been working in ceramics since the mid 1990s, these beads about finished off my desire to continue working in ceramic clay. Maybe that's why a few months later I started to focus on polymer beads instead. I haven't done any ceramics since.


The good news is, of course, that Street Sense won the Derby and many of us were in the hallowed ground of the Kentucky Derby winner's circle wearing the bead necklaces I made. In the above photo of the cover of the Daily Racing Form, the woman in the white dress and hat with her hand raised is wearing my bead necklace while in the Derby winner's circle. If you click to enlarge the photo you can probably see it better.

Monday, January 28, 2008

Garden Bracelet with glass, polymer, and lucite beads


I made this bracelet recently, trying to cheer myself up and think spring in the midst of a very snowy winter. It is a Lucite Garden Bracelet that was in the spring 2007 (issue #12) of Bead Unique magazine. The article was written by Kelli Burns and Tarlee Yeoman.

Anyway, I bought the issue last year and finally got around to making this bracelet, which was a lot of fun. I made my own polymer focal bead. I still haven't done much cane work so I bought polymer flower canes on etsy and made a bead from it. I'm sure I will start making flower canes myself at some point, but I also like doing business with other artists. The flower cane was made by Seana.

Wednesday, December 12, 2007

Black and White Kaleidescope Cane


Following the instructions in Donna Kato's book, The Art Of Polymer Clay, I made a black and white kaleidescope cane and made a few beads out of the results. What fun!


And here's a bonus surprise to this abstract technique. I cut off the end of the cane, and discovered a bird image (left)! It was only on the end, once I made more slices, the bird was gone. Still, this bird will make a nice focal bead. The photo shows it in it's raw, sliced state. The image on the right was another unusual slice off of the other end of this same cane, I made it into a dime sized bead. The rest of the cane, shown in the top photo, is fairly uniform throughout.

Donna says in her book she was pleasantly surprised to find she could use up her scrap pieces to create these kaleidescope canes. I have made a few more of these canes with arbitrary scraps, and have to admit some of my color combinations were pretty darn ugly. Donna may manage to pull it off, but for me, I'll probably be a little careful of my color combinations.

Sunday, November 25, 2007

Finished Clichy Rose Necklace


I finished my first piece of wearable polymer and here it is. I made it with the assistance of Donna Kato's book, The Art Of Polymer Clay. I followed her Clichy Rose Cane instructions, and what I learned was that the center (pink flower in this case) does not reduce as much as the outside of the cane. I am new to cane making, so this was quite an advance for me to make beads that turned out nice enough to wear.

I recommend Donna's book as an addition to any polymer library. She covers a lot of ground with basic information and inspiring examples. One downside to covering a lot of ground is that not much space is devoted to each technique, it's enough to get you started, though, and there are a lot of techniques in this book that I'm sure I will rediscover as I look through this book in the future.

Wednesday, October 31, 2007

Halloween Beads


These beads were made with Halloween colors in mind, kind of fun, kind of spooky, but certainly not a skull buster technique. I was just marveling at the swirls of color I made and how easy it was to make them.

I am convinced that bead making for me is going to be polymer from now on--I have had too many disappointments with my ceramic beads, putting hours of work into a load only to have the glaze firing not come out as I hoped. Mixing polymer colors to create beads is much more rewarding, because wysiwyg.

Wednesday, October 10, 2007

Press Mold Polymer Horse Beads

Sometimes you forget where the seed of a new direction comes from. But before I get too deep into polymer and forget what started it for me, this post is about what really launched me into polymer. I have been working in ceramics since the 1990s, and have made lots of horse beads in ceramic clay.

Then this fall I bought a custom tooled leather purse from Beas Bargains on etsy. I decided to make a purse dangle to put on it, stringing some eclectic vintage beads. Over the years my beading tastes have evolved, and though I started out doing bead embroidery with seed beads, I have grown to love old, earthy beads that look like they were dug up from an archaeological dig.

So anyway, here I am making a dangle with an eclectic group of beads from around the world, and I needed to put my individual stamp on it with my own handmade beads. Since this was going to be a purse dangle, I wanted my bead to be less breakable than the ceramic beads I normally make, so that's where polymer came in. (I had used polymer on and off just a bit over the years, but nothing serious. I didn't see the potential and wasn't aware of the great art being made with polymer.)

Falling back on my ceramic mold making experience, I made a two-sided press mold using Sculpey Super Elasticlay MoldMaker. I had an original sculpture I made from Chavant oil based modeling clay (I was making plaster molds for ceramic slip casting with the little horse sculpture) that I pressed into one side of the mold material. I then removed the horse sculpture and baked one side of the mold. When it cooled, I put the horse sculpture back in the first side and pressed the mold material into the second side. Removed the horse and baked the second side.


Now I have a two sided press mold, so my resulting polymer horses are fully dimensional.


Monday, September 24, 2007

Stained Glass Cane


This polymer cane is not what my ultimate vision is, but I found a stained glass tutorial that looked intriguing so I tried it. I actually dislike the color combination and don't see myself using this cane for anything. But again, I'm new to polymer so this is just a trial cane. It's all about the journey, right?

Sunday, September 23, 2007

My First Polymer Cane

It's easy to find simple polymer tutorials on the web, I ended up following Desiree McCrorey's bullseye lace cane tutorial to create my first cane. I'm just trying things right now, getting the feel of polymer and seeing where it takes me. It's easy to be impatient and want smashing results right off the bat, but I understand there is a lot to know, and a lot of different directions to go with polymer so my early efforts are strictly educational.

I know a few things for sure about what I seek in polymer: making beads is my top preference, and I like an organic, asymmetric look over symmetry and geometric shapes.

Here is my black and gold lace cane and some unpolished beads I made from the cane. I found out that curing beads in the oven on a foil lined cookie sheet leaves flat shiny spots. I'll be doing something different in the future to avoid that problem.


Friday, September 14, 2007

I Launch Into Polymer

I got this idea to make my own polymer beads the other day.

I tried working with polymer in the mid 1990s, but it didn't click with me. I didn't think it had that much potential, so I moved on to working with ceramic clay. Luckily there were lots of artists and crafters out there who saw what I didn't see in polymer. They have spent the last many years honing, perfecting, experimenting, and most importantly, sharing what they have learned to do with polymer clay.

Who are "they"?

As time goes on, I'm going to name names and give credit to those who's creativity and willingness to share helps other artists learn. These polymer artists are all over the 'net sharing tutorials, writing books, blogging, teaching workshops, and recording how-to DVDs on polymer.

I want to share information, too, as well as record my adventures into a new medium right from the beginning. So this blog is not about being an expert in polymer, but rather my own path of discovery as I learn from polymer experts.

Thursday, August 30, 2007

August Beaded Journal Page


6" x 8"

Continuing on with my "Inspired By Horses" theme, my August page incorporates a beaded bucking horse that has been languishing in a drawer since I made it in October, 2000. This is not just any old unfinished piece, it's the first beadwork I ever did!

I launched into beading based on a photo I saw in a western style magazine in the fall of 2000. It was a bead embroidered bucking horse and I did not know how it was done, but I jumped on the internet to find out. I discovered these little beads were called seed beads. Honestly, I didn't know anything about beads! I ended up ordering my first seed beads online and was so excited when they arrived.

I learned how to do backstitch from a bead book I bought, and my first beaded piece was this bucking horse on ultrasuede. I planned to appliqué the finished beadwork onto a leather vest I was going to make. I never did make the vest, I instead started working on other beading ideas for Christmas presents that year.

So the beaded bucking horse on ultrasuede got put aside for seven years but now has a home as the August page in my Bead Journal Project. As I look at it today, I realize how far I have come in my ability to bead embroider and plan how the design is going to come out. With figural subjects, I now outline the design first, then fill in with beads row by rows. In this first piece, I did not outline first, and ended up losing control of how I wanted it to look.

When I started this BJP, I wanted to try to use beads and fabric I already own, and not run out and buy more stuff. Some of the other BJP participants are doing this, too. Though the rest of the year's worth of BJP pages are likely to be original, I am happy I was able to pluck a forgotten piece out of the drawer and breathe new life into it.

Please stop by my art blog, carengoodrich.com, and vote in the "what's your favorite horse color" poll I have posted. The results will affect a future BJP piece.

Monday, July 30, 2007

July Beaded Journal Page


Cinder And Me In The Summer Of '69

6" x 8"


Continuing on with my "Inspired By Horses" theme, for July's page I step back in time to 1969.

I was twelve that year, and had been horse crazy since birth. My sister and I campaigned our parents for years to buy us a horse, and finally in April, 1969, we got a horse named Bobby. My sister and I took turns riding Bobby, and then my parents realized that it might be wise to get a second horse. In July, we bought a pony. She was black as coal, and I named her Cinder. Cinder became mine alone, and we fit together like a glove.

me and Cinder in the summer of 1969 at Flying W Stables in Paramount, California


We were told Cinder was originally from Wyoming, although I was never able to confirm that. But as a kid born and raised in the Los Angeles area, Wyoming was the wide open spaces where cowboys roamed the prairies....far away from the concrete riverbeds and railroad tracks where I rode horses with my friends.

I rode Cinder for years in local gymkhanas, (barrel racing, pole bending, and other events) we won lots of ribbons and trophies despite the fact she was much smaller than the other horses we competed against. She was fast and agile, and I thought she was the best horse on earth.

I owned Cinder until I graduated from high school, when I sold her to another girl who loved Cinder almost as much as I did. Eventually Cinder was sold to someone else, and I lost track of her at that point. If I had to do it over again of course, I would have kept her forever.

This is not the first time I have created this image. Many times over the years I have done drawings and paintings of a barefoot girl on a horse flying through the air, with no saddle, no bridle. It's all about freedom and the carefree days of youth, it's a very personal theme for me and as close as I ever come to doing a self portrait.